We in Ohio have been blessed with really good weather for a change. We have not had much snow at all, other than a tiny dusting here and there - that is - until today. Today I think we got nearly 10" and there is supposed to be a little more on the way. It is January after all. But somehow I had this irrational hope that it would hold off until, oh, say...about APRIL! And then, be SPRING! Ha-ha!
I've had a lot of little changes in my life this fall and have had to come to terms with some health issues, but overall, I'm a very lucky lady. And I even found a little time to make some art before Christmas - most of which was gifted to others. I did the little 8" x 8" painting here - done in acrylics and mixed media. I gave it to my sister Carrie (who is a writer) and while it isn't an accurate snapshot of the women in our family, it is perhaps more "representational" of them. I really love that primitive, flat-dimensioned look of the paintings done in the early 1800's so was going for that sort of look, but they were meant to depict, L-R, back row - my mom Patricia Louise Strachan Ryman, her mom, Mildred Elizabeth Irvin Strachan and HER mom, Carrie Minerva Mitchell Irvin. The front row is, L-R - my sisters, Cynthia Lea Ryman Newsome and Carrie Ann Ryman and me, Diana Louise Ryman. It was a lot of fun to work on and I think my sweet sis really liked it.
In 2012 I'm hoping to focus on more de-cluttering of my art stash, painting a room or two in the house and the more fun type of painting - on canvas. I've always admired the looser, more "painterly" style some artists such as Mystele and Sharon Tomlinson, achieve. So I plan to teach myself how to paint this way too. I feel like my work is too up-tight and controlled. One of my friends, Jean Field, recently suggested that I "use a larger brush" to help me achieve this look, so I'll start there. Sounds so simple, doesn't it? Ha! Wish me luck!
Bookbinding, sketching, and mixed media are just a few of the things that occupy my art time. Come see what I've been up to....
Showing posts with label art. Show all posts
Tuesday, January 03, 2012
Tuesday, November 01, 2011
Enough is enough!
Have you ever had to have "the talk" with yourself? No - not the S-E-X talk. The S-T-U-F-F talk is what I mean. That's when you have to tell yourself (sometimes repeatedly) that you have enough STUFF already and you don't need another pencil, pen, tube of paint, bit of ephemera, or whatever the stuff happens to be at the moment. I've had this talk with myself over and over this year. Expenses are higher, income is smaller (lost my PT income). But the real breaking point for me is there is just no more space to put the stuff I keep bringing into this house! And I live alone in a 3 BR house with a huge attic and full basement so there just is no excuse for this. Also driving this new clarity for me is that I've been working all year, a little at a time, on cleaning out parts of my parents home in preparation for selling it. I'm seeing the detritus of 50+ years in one home and while I'm tickled to find things my mom saved, like our letters to Santa, written 40 yrs or more ago, there are things that I'm wading through that just didn't have to be saved all these years. Like every bill they ever paid. Like every old DayTimer filler from 30 yrs. of business calendaring. All this sorting through the bits of a lifetime is making me take a long hard look at my own home and the things I choose to save. And, as I discovered this afternoon, when I removed the cartoon-y band aid from the site of my flu shot, and I thought - "hmmm - I should use this in a journal layout - it would be cool to have this little bit of my DNA immortalized along with my thoughts for the day" - then I realized, ok kid, you definitely have gone OVER the edge if you are thinking about keeping a used band aid as fodder for artwork! Yes, I know - EVERYTHING can be recycled or upcycled and everything is fair game for our artistic creations. But enough is enough! So tonight I am having "the talk" with myself, yet again. Sigh. I'd be interested in hearing how (or where) you draw the line on the "stuff" you choose to keep for your art.
Monday, June 27, 2011
Been Painting Again...
![]() |
| June 2011 - 8 x 8 canvas |
Some Time Ago....
![]() | |
| Prompt - Shine |
![]() |
| Prompt - Portals |
![]() |
| Prompt - Fairies |
![]() |
| Prompt - Haiku |
![]() |
| Prompt - Hearts |
![]() |
| CPS - Muse Flash - Art Gang Ohio Projects |
Friday, October 01, 2010
Art at KSU
I just had to share this. KSU has a brand new performing arts theatre that will have it's grand opening later in October. In the lobby of the theatre is currently being installed, a commissioned work from Cleveland artist, Olga Ziemska. I think I read that the funding came from an Ohio arts grant. You just have to look at her blog - Olga Ziemska - and see the pictures - most from her studio - of this work in progress this summer. Be sure to scroll to the bottom of the page because there are some "other" posts in the middle. This artist worked with dance & theatre students here at Kent State to pose for the outlines of the figures. She is using some gorgeous pictures of Northern Lights as her inspiration for movement and color. Each figure is cut from a sheet of clear acrylic. She evidently raided our KSU photo archive for the pictures our photographers have taken over the years of students, plays, dance performances, events around the campus, and anything else she found that was colorful and depicted life and art at the university. Ziemska is using five sizes of clear acrylic cabochons and adhering pieces of the photographs to the flat sides of each cab. Then the acrylic figures are filled with waves of the colorful cabachons to complete each piece. The figures will be laid out along a wall in the lobby of the theatre. It's hard to tell from the photos, but I suspect she is going to use some sort of suspension system and maybe, I hope, back lighting. It will be interesting to see how this artist completes this installation. I can't believe that those figures would just be screwed to the yellow wall, but that's just me. I may go over to the theatre on my lunch hour Monday to see the progress of the installation. Our dept. photographers are taking pictures of the process too. For some reason, this work is just speaking to me and I can't wait to see it finished. Of course, all those luscious blues and greens and purples are right up my alley! Enjoy!
Labels:
acrylic,
art,
artist,
arts grant,
cabachon,
Kent State University,
KSU,
Northern Lights
Wednesday, February 17, 2010
Assemblage gift
My first try at some assemblage. I'd had this in mind as a gift for a special friend for some time - and had laid out the various pieces on my desk in the basement studio, but just never got around to completeing it. My friend Gina's 30th birthday
this month was the prod I needed to get it done. And my fledgling experience recently with making cold connection rivets with copper wire helped me assemble it. You need to know about some of the components - the antique brass stencil G, the metal stamped "IRON" and the 20 and 15 that are part of the ruler "arms" are a nod to Gina's blog IronG 2015. Gina is a triathalete and is in training for the 2015 Ironman. Whoa! Pretty big goal - and I have no doubt that she will make it! Back to the assemblage - see her crown? It is supposed to be a cupcake. Yeah - hard to believe that a hardcore athlete like Gina has a cupcake addiction, but she does! But she is really good and after eating the cupcakes (unlike me) SHE goes out and runs it off! The little legs are from a computer board scavenged for me by a friend at work and cut on my bandsaw. I'm betting Craftsman never thought their saw would be used for some of the whacky things that I cut with it! Anyway, it was lots of fun to make and Gina got a kick out of it so I'm a happy camper. Hmmm....I have a bunch of those brass stencils......Tuesday, November 03, 2009
Happy Halloween!

Yes, I know. I'm a couple days late. Oh well, better late than never, I say. I started this little painting two weeks before the holiday with the intent of making it into a print for cards for family and friends. But circumstances changed and I invited the whole family to my place for Trick or Treating. It suddenly hit me that that meant I'd best get my butt in gear and CLEAN my house - not to mention finishing some projects outside before the cold weather sets in. So my little paint got set aside and wasn't finished until Nov. 1 after all the festivities were but a memory. It was a sketch first, then I washed the background with watercolor and finished all the details with acrylic paints. Every one of these little paintings teaches me a thing or two about how the paint works, and about how to control it better. Also I still need to learn a lot more about shading. But I'm getting better each time, I think. Guess I'll be ready for Halloween next year! It was fun to do it and am now thinking of images I can draw and paint for a little Christmas scene.
Thursday, May 28, 2009
Art Journaling (cont. 3)

The copper cobweb page is a tip in. Something I had never tried, but had admired in other artist's journals. The delphiniums are from my garden and yes - they were really that blue Decided to try painting some on the reverse of the pages. I also tried my hand at a crackle technique on these pages too. See the yellow peeking through the navy, night sky? On the pages with the painted flowers, you can see, (if you click on the picture to see the larger size) that I glued down some tiny blue/green and copper round bits. Those bits are actually the waste left over from computer boards being created and holes punched. My sister Cindy, and BIL Kelly, kindly brought these (and other types) to me after learning that I used all sorts of leftovers to create art. They told me that what looks like copper is, in some cases, actually GOLD. Whoo hoo! Maybe I should insure my book..... :-) The lime green page is one I did after my baby sister, Carrie, told me she was considering becoming a Druid. So of course I had to investigate it and learn what I could about it. Sounds like a perfect type of religion for her. It reveres all that is of the earth - wind, sky, water, trees, animals. And it's primary tenet seems to be doing good things for and to one another. Be the good example you want others to be. Very interesting.
Art Journaling (cont. 2)

I had to journal at least one page about Obama. I had admired him for several years ever since seeing him on a talk show. He just made so much sense and was very unlike the normal "politician" that we are all sick of. Was so tickled when he actually decided to run for President and even more thrilled when he won! Hope that he keeps his word now and helps our country get back to being the highly esteemed nation it once was. The page with the lady in blue with the waving hair is my attempt at doing the style of art journaling that I've seen Susan Shie do on her journal quilts. I knew I'd never do a whole quilt like she does, so took her style to my art journal pages instead. It was fun, but (and I know my friends won't believe this of me) way more detailed and intense than I normally like to do! Give me a mindless doodle any day!
Art Journaling

I've been working on this art journal for more than two years. It started out to be a journal that I'd use for my art group and the monthly prompts we'd agreed on. That went out the window pretty quickly for me and it turned into the place that I captured cool quotes and sayings and practiced different techniques and looks that I admire from other artists. I only need to finish one more spread and then the covers so decided I'd get some of the pages scanned and shared here now. See what you think.
Thursday, April 23, 2009
Susie art
Have you ever seen the wonderful, folksy quilts created by 
Ohio artist, Susan Shie? She calls her art "outsider" and boy does she have a definitive style all her own! She has been "out there" and way ahead of the pack for as many years as I've been quilting (25+ oh my!) When I was doing all the traditional quilting stuff, Susie was making some fabulous pieces with super heavy quilting, thick battings, and lots and lots of embroidery, beading and mirrors. Now that I'm into some of the more "artsy" quilts, Susie has moved on ahead again and is creating huge narrative journals on her quilts. They are still very folksy in form with whimsical figures and pictures all over them. And Susie's painting them with the use of an airpen, which is similar to an airbrush, but with far more control. Anyway, I just love her journal quilts but know I don't want to invest in the equipment or time to do it her way, so I sort of improvised and created a small 8 x 10 size piece on card stock. It was my friend's birthday so I decided to do it using all the "aging" quotes I could find and turned it into a birthday card for her by scanning and reducing it to a card size afterwards. It was a lot of fun to try.

Ohio artist, Susan Shie? She calls her art "outsider" and boy does she have a definitive style all her own! She has been "out there" and way ahead of the pack for as many years as I've been quilting (25+ oh my!) When I was doing all the traditional quilting stuff, Susie was making some fabulous pieces with super heavy quilting, thick battings, and lots and lots of embroidery, beading and mirrors. Now that I'm into some of the more "artsy" quilts, Susie has moved on ahead again and is creating huge narrative journals on her quilts. They are still very folksy in form with whimsical figures and pictures all over them. And Susie's painting them with the use of an airpen, which is similar to an airbrush, but with far more control. Anyway, I just love her journal quilts but know I don't want to invest in the equipment or time to do it her way, so I sort of improvised and created a small 8 x 10 size piece on card stock. It was my friend's birthday so I decided to do it using all the "aging" quotes I could find and turned it into a birthday card for her by scanning and reducing it to a card size afterwards. It was a lot of fun to try.
Wednesday, April 22, 2009
New Stamp Designs
I'm so proud to announce that my good friend, Dawn Burrows, who is a talented graphic designer by day and an equally awesome mixed media artist by night, has just produced her first two sheets of rubber stamps! She's selling them via her Etsy site so please go check them out! Some parts of these designs began life as her family photos, but they then underwent a lot of tweaking and fluffing to get them just right. LOVE the little girl reaching for the star and the little boy sitting on the building blocks. There are some great architectural pieces too that will make for some really great ATC's as well as greeting cards. I'll be posting some pics in the next day or two of what I'm doing so far with these stamps.
Friday, September 19, 2008
My Fall List

I love Fall. The cooler weather, the crisp nights, the awe inspiring colors of the trees and most of all, I love, love, love - HALLOWEEN! Especially the witches! But Fall for me brings a long list of projects I need to complete before the first Saturday in December (Dec. 6 this year).
That is the
date that, with my dear friend, Dawn Burrows, we hold our annual Christmas Open House. So all fall we are both in "full production mode", designing and creating new items to sell at the open house. Right now I'm working on Santas. I found a pattern I really love for a German Santa at the Country Cupboard in Berlin, OH (right in the heart of Amish country). It is made with a wool coat and hat/hood, trimmed with faux fur. He is holding a bag of polymer clay "oranges" and a sprig of evergreen topped with a tiny, red, glass bead. See what you think. Right now all my energy goes into the stock for the open house, but right after Dec. 6, any of the extras I make will be posted to my Etsy shop.
date that, with my dear friend, Dawn Burrows, we hold our annual Christmas Open House. So all fall we are both in "full production mode", designing and creating new items to sell at the open house. Right now I'm working on Santas. I found a pattern I really love for a German Santa at the Country Cupboard in Berlin, OH (right in the heart of Amish country). It is made with a wool coat and hat/hood, trimmed with faux fur. He is holding a bag of polymer clay "oranges" and a sprig of evergreen topped with a tiny, red, glass bead. See what you think. Right now all my energy goes into the stock for the open house, but right after Dec. 6, any of the extras I make will be posted to my Etsy shop. Check out these pics. The bodies with heads are done and awaiting clothes and beards, so they are all lined up on my table and they are STARING at me! It really is an odd feeling to look over and see all of them...."sew faster! we need clothes! no gifts for you, you bad girl!"
I finished one and took it to Dawn's to do a cat test. Two years ago I made the mistake of using wool from a friend of a friend, who had sheep, for the Santa's beards. The cats ripped off beards and scattered the Santas from one end of the house to the other! And other people who bought them had similar situations with their pets too. It had to be that the wool beard material hadn't been cleaned enough (it looked and smelled fine to ME) to get a scent out that only another animal could smell. I replaced beards on a number of Santas that year. Now I cat test if I'm using anything that hasn't been commercially processed. This year's Santa sports a curly, silky beard of Border Leicester wool and I just love how it looks. The cat's sniffed it once and walked away, so we're good to go!
I've been hitting all the rummage sales buying up old coats and skirts, then cutting them up and felting them for the Santa's coats and hoods. So far I'll have some in dk. red, dk. green, gold, brown and maybe some in a cream too. I'd still like to find a nice medium or country blue too.
Monday, July 07, 2008
Weekend Painting Job

I've been wanting to try my hand at these little landscapes taught by Karyn Gartel for some time. A friend took her class and was kind enough to show me how to do it too. They were a lot of fun and I love how they are so whimsical and folk artsy. I was most amazed that you could actually paint on canvas using the inexpensive sort of craft acrylic paint you buy at the hobby stores. I notice now that I'm seeing both the day and night versions side by side, that I made a few errors - the hills in the night one are brighter and lighter in color than the daytime one and it really should be the other way around, shouldn't it? Maybe I should go back in and paint a big cloud obscuring the sun! And don't tell, but I have my light source coming from the left on the day time piece, but my shadows for the trees and houses go the opposite direction! Duh! I don't care. I'm still happy with them as I've never painted on real canvases before and now, having done this, I'm not so intimidated so may try some other things later on. If you'd like to see Karyn Gartel's site and the classes she offers, check out her workshop blog.Bandana Prints
These were a natural next step with the "doodling" I've been doing for
some time now. Saw the technique online at: PearlEsq
a blog by Robin Beam, who is the
education director for Ranger Industries. I guess I'm behind the times because she has been doing this for some time now it appears! Oh well, better late than never! I've been having fun with this technique making backgrounds for cards, etc. and even did an envelope on a momentary whim last week. I love sending a little bit of art in the mail to perk up someone's day. Just wish I had more time for that! The technique in a shortened version is:
1. rub Distress Ink pads (or any dye ink pads) on a teflon sheet - don't overlap colors or they will muddy
2. spritz inked sheet with water - pretty heavily
3. drag a piece of watercolor paper through the wet dye once, then dab here and there into remaining wet dye to cover entire piece (easier to work with 1/4 sheets or so) of w/c paper
4. I found you can go back direct to paper with the ink pads adding a dab of ink here and there, then spritz the area with some more water to make it run and blend with the existing colors.
5. set aside to dry and do some more backgrounds
6. when background is dry (can speed with heat gun), stamp flourishes or any stamps you want to fill in a random pattern. Robin recommends the black acrylic paint dabber by Ranger. I tried it and preferred the Stazon black pad for clear, crisper images.
7. high light here and there alongside the stamped black images using a good, opaque, white pen. Here again, I prefer the Signo pen, but my friend Dawn let me try her new Extra fine white waterproof Sharpie marker and it is pretty great too!
8. I added some random dots here and there, but that is just me and I never know when to stop doodling!
Thanks Robin for another great technique!
some time now. Saw the technique online at: PearlEsq
a blog by Robin Beam, who is the education director for Ranger Industries. I guess I'm behind the times because she has been doing this for some time now it appears! Oh well, better late than never! I've been having fun with this technique making backgrounds for cards, etc. and even did an envelope on a momentary whim last week. I love sending a little bit of art in the mail to perk up someone's day. Just wish I had more time for that! The technique in a shortened version is:
1. rub Distress Ink pads (or any dye ink pads) on a teflon sheet - don't overlap colors or they will muddy
2. spritz inked sheet with water - pretty heavily
3. drag a piece of watercolor paper through the wet dye once, then dab here and there into remaining wet dye to cover entire piece (easier to work with 1/4 sheets or so) of w/c paper
4. I found you can go back direct to paper with the ink pads adding a dab of ink here and there, then spritz the area with some more water to make it run and blend with the existing colors.
5. set aside to dry and do some more backgrounds
6. when background is dry (can speed with heat gun), stamp flourishes or any stamps you want to fill in a random pattern. Robin recommends the black acrylic paint dabber by Ranger. I tried it and preferred the Stazon black pad for clear, crisper images.
7. high light here and there alongside the stamped black images using a good, opaque, white pen. Here again, I prefer the Signo pen, but my friend Dawn let me try her new Extra fine white waterproof Sharpie marker and it is pretty great too!
8. I added some random dots here and there, but that is just me and I never know when to stop doodling!
Thanks Robin for another great technique!
Monday, June 02, 2008
Sally Jean Style

I seem to be in a "learn the styles of others" phase. We had a play night recently and a good friend showed us how to make the most wonderful "Sally Jean Alexander" style altered pages. What fun! I love the way these come out and think its a combination of subtle, toned down color on the page plus only black and white or sepia imagery. And then the thing that really pops it off the page is the use of charcoal pencils to outline the images and sort of grunge it up here and there. I did this piece first and since, have done a bunch of ATC's too - which I promptly traded away to my friends in the Art Gang Ohio group this last weekend!
Attempt at acrylic painting

of painting and am trying my hand at it. Not the greatest initial results, but I'm progressing a bit. This is my third one. I think what I love most about her style is the ghostly, eerie skin tones and for some reason I just cannot seem to get them right. Since taking a class with her anytime soon is out of the question financially, I'll just continue to muddle through. It is fun to do though. The background of this piece started out as a great collaged background paper that my friend, Lill Mederak created and traded with me a couple months ago. Thanks Lill!
Wednesday, March 05, 2008
ATC's for Lill

This is the second set of ATC's I've exchanged with Lill Mederak in Canada. I waited to post these until I knew she'd have received her package so as not to spoil the fun. I do love this little format - both for it's ease and quickness to complete and for it's tradeability too. I just organized all my ATC's in a three ring notebook with those clear vinyl baseball card sleeves and arranged them in groups - lots of eraser carved ones from my early days with the Carving Consortium and then later groups in various swaps. I also have enough from a few dear friends to make a whole page of work by that one artist, which is fun to see. My style has certainly changed and I think, improved too, over the years.
Sunday, February 10, 2008
Tribal Inspiration

Isn't it fun to get inspiration for something you love to do from the most unexpected places? I was recently looking at some lamp worked beads on line and came across some that are done using various aboriginal designs. No - I'm NOT going to try my hand at lampworking on top of everything else I can't seem to say no to! But the swirls and circles and undulating snake-like shapes really spoke to me so I just had to doodle with them. Here's my first attempt. This was done on white watercolor paper using the Faber Castell Pitt Artist pens in both the brush size and the S size for the tinier detail stuff. I think I'll have to play more with these sort of designs and I think I really want to try doing it on top of some of my hand dyed watercolor paper too.
Sunday, February 03, 2008
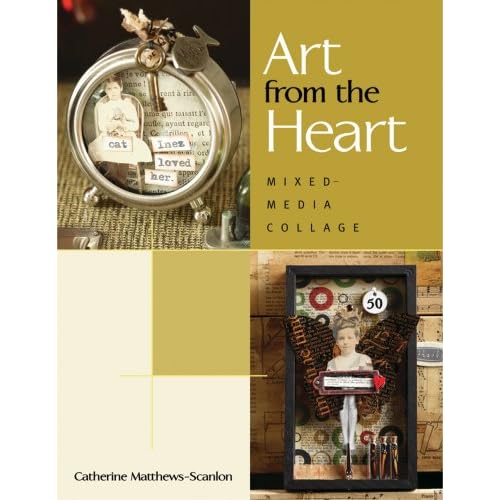
Art from the Heart - New Book - and a chance to win!
If you haven't already heard about this awesome opportunity, it's not too late!
Artist, Catherine Matthews-Scanlon is giving away two copies of her new book, Art from the Heart and YOU could be the lucky winner. But you only have one day yet to enter the drawing so don't delay!
If you are interested in winning a copy, all you have to do is post about her give away on your blog and you'll be entered to win one of the two copies of this new book, which by all accounts sounds like it will be a huge hit! You'll also need to post a comment on Catherine's blog so she knows you're playing along and should be entered into the drawing. She'll be checking your blog to be sure you've posted about the book and giveaway.
Aren't artists fun people?! And so smart too! Best of luck with your book Catherine!
Labels:
altered,
altered books,
art,
artist,
books
Subscribe to:
Posts (Atom)